Introduction
Having an experience composed of only WebGL is great, but sometimes, you'll want the experience to be part of a classic website.
The experience can be in the background to add some beauty to the page, but then, you'll want that experience to integrate properly with the HTML content.
In this lesson, we will learn how to use Three.js as a background of a classic HTML page. We will make the camera translate to follow the scroll. We will discover some tricks to make this scroll more immersive. We will add a cool parallax animation based on the cursor position. And finally, we will trigger some animations when arriving at the corresponding sections.
Setup
This lesson is a good opportunity to practice many of the techniques we've already learned. Instead of having the environment already set up, we will do most of the work ourselves.
The OrbitControls has been removed because we want the camera to move according to the scroll and to not let the user rotate about as in prior lessons.
lil-gui is already available and one color as been created to be used later:
/**
* Debug
*/
const gui = new GUI()
const parameters = {
materialColor: '#ffeded'
}
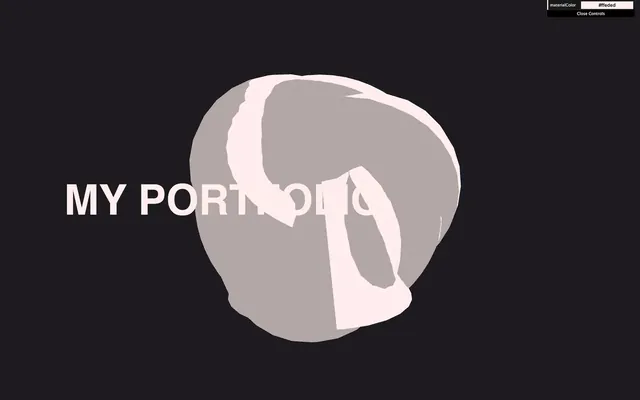
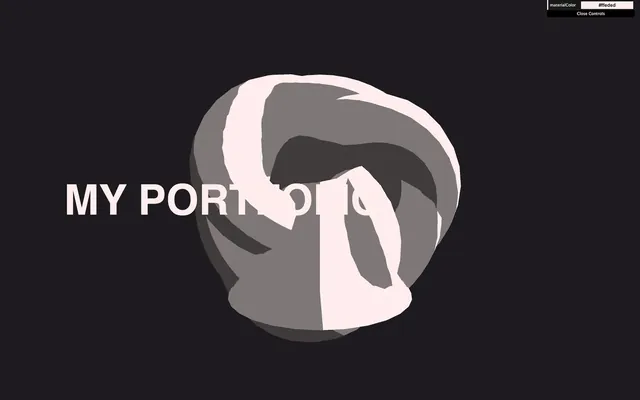
gui.addColor(parameters, 'materialColor')Some very simple HTML content has been setup already. Currently, you can only see one title but there are two sections right below. We can't see them because the scroll is blocked.

HTML Scroll
Activate the scroll
Earlier in the course, we deactivated the scroll using this CSS:
html,
body
{
    overflow: hidden;
}
To reactivate it, remove the overflow line in /src/style.css.

You should be able to scroll and see the two other sections below.
Fix the elastic scroll
In some environments, you might notice that, if you scroll too far, you get a kind of elastic animation when the page goes beyond the limit.
While this is a cool feature, by default, the back of the page is white and doesn't match our experience.
To fix that, we could have set the background-color of the page to the same color as the clearColor of the renderer . Instead, we are going to make the clearColor transparent and only set the background-color on the page.
To do that, in /src/script.js, you need to set the alpha property to true on the WebGLRenderer:
const renderer = new THREE.WebGLRenderer({
    canvas: canvas,
    alpha: true
})
By default, the clear alpha value is 0 which is why we didn't have to set it ourselves. Telling the renderer to handle alpha is enough. But if you want to change that value, you can do it with setClearAlpha:
renderer.setClearAlpha(0)

We can now see the back of the page which is white.
In /src/style.css, add a background-color to the html in CSS:
html
{
    background: #1e1a20;
}
We get a nice uniform background color and the elastic scroll isn't an issue anymore.
Objects
We are going to create an object for each section to illustrate each of them.
To keep things simple, we will use Three.js primitives, but you can create whatever you want. And later in the course, you'll learn how to import custom models into the scene.
In /src/script.js, remove the code for the cube. In its place, create three Meshes using a TorusGeometry, a ConeGeometry and a TorusKnotGeometry:
/**
 * Objects
 */
// Meshes
const mesh1 = new THREE.Mesh(
    new THREE.TorusGeometry(1, 0.4, 16, 60),
    new THREE.MeshBasicMaterial({ color: '#ff0000' })
)
const mesh2 = new THREE.Mesh(
    new THREE.ConeGeometry(1, 2, 32),
    new THREE.MeshBasicMaterial({ color: '#ff0000' })
)
const mesh3 = new THREE.Mesh(
    new THREE.TorusKnotGeometry(0.8, 0.35, 100, 16),
    new THREE.MeshBasicMaterial({ color: '#ff0000' })
)

scene.add(mesh1, mesh2, mesh3)

All the objects are, of course, on top of each other. We will fix that later.
Again, in order to keep things simple, our code will be a bit redundant. But don't hesitate to use arrays or other code structuring solutions if you have more sections.
Material
Base material
We are going to use the MeshToonMaterial on all three Meshes.
As in the Materials lesson, we are going to create one instance of the material and use it for all three Meshes.
When creating the MeshToonMaterial, use the parameters.materialColor for the color property and apply it to all 3 Meshes:
// Material
const material = new THREE.MeshToonMaterial({ color: parameters.materialColor })

// Meshes
const mesh1 = new THREE.Mesh(
    new THREE.TorusGeometry(1, 0.4, 16, 60),
    material
)
const mesh2 = new THREE.Mesh(
    new THREE.ConeGeometry(1, 2, 32),
    material
)
const mesh3 = new THREE.Mesh(
    new THREE.TorusKnotGeometry(0.8, 0.35, 100, 16),
    material
)

scene.add(mesh1, mesh2, mesh3)

Unfortunately, it seems that the objects are now black.
The reason is that the MeshToonMaterial is one of the Three.js materials that appears only when there is light.
Light
Add one DirectionalLight to the scene:
/**
 * Lights
 */
const directionalLight = new THREE.DirectionalLight('#ffffff', 3)
directionalLight.position.set(1, 1, 0)
scene.add(directionalLight)
You should now see your objects.
We are using the color stored in the parameters object, but changing this value with the Tweaker doesn't change the material itself.
To fix that, we can listen to the change event on the already existing tweak and update the material accordingly:
gui
    .addColor(parameters, 'materialColor')
    .onChange(() =>
    {
        material.color.set(parameters.materialColor)
    })
Gradient texture
As we saw in the Materials lesson, by default, the MeshToonMaterial will have one color for the part in the light and one darker color for the part in the shade.
We can improve that by providing a gradient texture.
Two gradient images are provided in the /static/textures/gradients/ folder.
Instantiate the TextureLoader before instantiating the material. Then load the textures/gradients/3.jpg texture:
// Texture
const textureLoader = new THREE.TextureLoader()
const gradientTexture = textureLoader.load('textures/gradients/3.jpg')
Use it in the gradientMap property of the material:
// Material
const material = new THREE.MeshToonMaterial({
    color: parameters.materialColor,
    gradientMap: gradientTexture
})
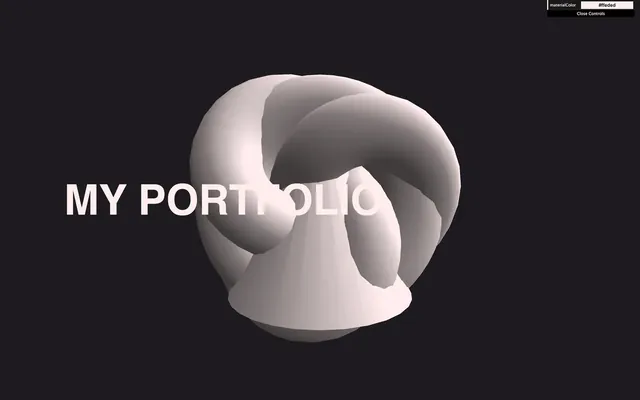
Not the toon effect we were expecting.
The reason is that the texture is a very small image composed of 3 pixels going from dark to bright. By default, instead of picking the nearest pixel on the texture, WebGL will try to interpolate the pixels. That's usually a good idea for the look of our experiences, but in this case, it creates a gradient instead of a toon effect.
To fix that, we need to set the magFilter of the texture to THREE.NearestFilter so that the closest pixel is used without interpolating it with neighbor pixels:
const gradientTexture = textureLoader.load('textures/gradients/3.jpg')
gradientTexture.magFilter = THREE.NearestFilter
Much better, but we still need to position the meshes properly.
Position
By default, in Three.js, the field of view is vertical. This means that if you put one object on the top part of the render and one object on the bottom part of the render and then you resize the window, you'll notice that the objects stay put at the top and at the bottom.
To illustrate this, temporarily add this code:
mesh1.position.y = 2
mesh1.scale.set(0.5, 0.5, 0.5)

mesh2.visible = false

mesh3.position.y = - 2
mesh3.scale.set(0.5, 0.5, 0.5)
The torus stays at the top and the torus knot stays at the bottom. When you're done, remove the code above.
This is good because it means that we only need to make sure that each object is far enough away from the other on the y axis, so that we don't see them together.
Create an objectsDistance variable and choose a random value like 2:
const objectsDistance = 2Use that variable to position the meshes on the y axis. The values must be negative so that the objects go down:
mesh1.position.y = - objectsDistance * 0
mesh2.position.y = - objectsDistance * 1
mesh3.position.y = - objectsDistance * 2

Increase the objectsDistance until the objects are far enough apart. A good amount should be 4, but you can go back to change that value later.
const objectsDistance = 4

Now, we can only see the first object. The two others will be below. We will position them horizontally once we move the camera with the scroll and they appear again.
The objectsDistance will get handy a bit later, which is why we saved the value in a variable.
Permanent rotation
To give more life to the experience, we are going to add a permanent rotation to the objects.
First, add the objects to a sectionMeshes array:
const sectionMeshes = [ mesh1, mesh2, mesh3 ]Then, in the tick function, loop through the sectionMeshes array and apply a slow rotation by using the elapsedTime already available:
const tick = () =>
{
    const elapsedTime = clock.getElapsedTime()

    // Animate meshes
    for(const mesh of sectionMeshes)
    {
        mesh.rotation.x = elapsedTime * 0.1
        mesh.rotation.y = elapsedTime * 0.12
    }

    // ...
}
All the meshes (though we can see only one here) should slowly rotate.
Camera
Scroll
It's time to make the camera move with the scroll.
First, we need to retrieve the scroll value. This can be done with the window.scrollY property.
Create a scrollY variable and assign it window.scrollY:
/**
 * Scroll
 */
let scrollY = window.scrollY
But then, we need to update that value when the user scrolls. To do that, listen to the 'scroll' event on window:
window.addEventListener('scroll', () =>
{
    scrollY = window.scrollY

    console.log(scrollY)
})
You should see the scroll value in the logs. Remove the console.log.
In the tick function, use scrollY to make the camera move (before doing the render):
const tick = () =>
{
    // ...

    // Animate camera
    camera.position.y = scrollY

    // ...
}
Not quite right yet. The camera is way too sensitive and going in the wrong direction. We need to work a little on that value.
scrollY is positive when scrolling down, but the camera should go down on the y axis. Let's invert the value:
camera.position.y = - scrollYBetter, but still too sensitive. Here's why.
scrollY contains the amount of pixels that have been scrolled. If we scroll 1000 pixels (which is not that much), the camera will go down of 1000 units in the scene (which is a lot).
Each section has exactly the same size as the viewport. This means that when we scroll the distance of one viewport height, the camera should reach the next object.
To do that, we need to divide scrollY by the height of the viewport which is sizes.height:
camera.position.y = - scrollY / sizes.heightThe camera is now going down of 1 unit for each section scrolled. But the objects are currently separated by 4 units which is the objectsDistance variable:
We need to multiply the value by objectsDistance:
camera.position.y = - scrollY / sizes.height * objectsDistanceTo put it in a nutshell, if the user scrolls down one section, then the camera will move down to the next object.
Position object horizontally
Now is a good time to position the objects left and right to match the titles:
mesh1.position.x = 2
mesh2.position.x = - 2
mesh3.position.x = 2
Parallax
We call parallax the action of seeing one object through different observation points. This is done naturally by our eyes and it's how we feel the depth of things.
To make our experience more immersive, we are going to apply this parallax effect by making the camera move horizontally and vertically according to the mouse movements. It'll create a natural interaction, and help the user feel the depth.
Cursor
First, we need to retrieve the cursor position.
To do that, create a cursor object with x and y properties:
/**
 * Cursor
 */
const cursor = {}
cursor.x = 0
cursor.y = 0
Then, listen to the mousemove event on window and update those values:
window.addEventListener('mousemove', (event) =>
{
    cursor.x = event.clientX
    cursor.y = event.clientY

    console.log(cursor)
})
You should get the pixel positions of the cursor in the console.
While we could use those values directly, it's always better to adapt them to the context.
First, the amplitude depends on the size of the viewport and users with different screen resolutions will have different results. We can normalize the value (from 0 to 1) by dividing them by the size of the viewport:
window.addEventListener('mousemove', (event) =>
{
    cursor.x = event.clientX / sizes.width
    cursor.y = event.clientY / sizes.height

    console.log(cursor)
})
While this is better already, we can do even more.
We know that the camera will be able to go as much on the left as on the right. This is why, instead of a value going from 0 to 1 it's better to have a value going from -0.5 to 0.5.
To do that, subtract 0.5:
window.addEventListener('mousemove', (event) =>
{
    cursor.x = event.clientX / sizes.width - 0.5
    cursor.y = event.clientY / sizes.height - 0.5

    console.log(cursor)
})
That's a clean value adapted to the context.
Remove the console.log.
We can now use the cursor values in the tick function. Create a parallaxX and a parallaxY variable and put the cursor.x and cursor.y in them:
const tick = () =>
{
    // ...

    // Animate camera
    camera.position.y = - scrollY / sizes.height * objectsDistance

    const parallaxX = cursor.x
    const parallaxY = cursor.y
    camera.position.x = parallaxX
    camera.position.y = parallaxY

    // ...
}
Unfortunately, we have two issues. The x and y axes don't seem synchronized in terms of direction. And, the camera scroll doesn't work anymore.
Let's fix the first issue. When we move the cursor to the left, the camera seems to go to the left. Same thing for the right. But when we move the cursor up, the camera seems to move down and the opposite when moving the cursor down.
To fix that weird feeling, invert the cursor.y:
const parallaxX = cursor.x
const parallaxY = - cursor.y
camera.position.x = parallaxX
camera.position.y = parallaxY
For the second issue, the problem is that we update the camera.position.y twice and the second one will replace the first one.
To fix that, we are going to put the camera in a Group and apply the parallax on the group and not the camera itself.
Right before instantiating the camera, create the Group, add it to the scene and add the camera to the Group:
/**
 * Camera
 */
// Group
const cameraGroup = new THREE.Group()
scene.add(cameraGroup)

// Base camera
const camera = new THREE.PerspectiveCamera(35, sizes.width / sizes.height, 0.1, 100)
camera.position.z = 6
cameraGroup.add(camera)
This shouldn't change the result, but now, the camera is inside a group.
In the tick function, instead of applying the parallax on the camera, apply it on the cameraGroup:
const tick = () =>
{
    // ...

    // Animate camera
    camera.position.y = - scrollY / sizes.height * objectsDistance

    const parallaxX = cursor.x
    const parallaxY = - cursor.y

    cameraGroup.position.x = parallaxX
    cameraGroup.position.y = parallaxY

    // ...
}
The scroll animation and parallax animation are now mixed together nicely. But we can do even better.
Easing
The parallax animation is a good start, but it feels a bit too mechanic. Having such a linear animation is impossible in real life for a number of reasons: the camera has weight, there is friction with the air and surfaces, muscles can't make such a linear movement, etc. This is why the movement feels a bit wrong. We are going to add some "easing" (also called "smoothing" or "lerping") and we are going to use a well-known formula.
The idea behind the formula is that, on each frame, instead of moving the camera straight to the target, we are going to move it (let's say) a 10th closer to the destination. Then, on the next frame, another 10th closer. Then, on the next frame, another 10th closer.
On each frame, the camera will get a little closer to the destination. But, the closer it gets, the slower it moves because it's always a 10th of the actual position toward the target position.
First, we need to change the = to += because we are adding to the actual position:
cameraGroup.position.x += parallaxX
    cameraGroup.position.y += parallaxY
Then, we need to calculate the distance from the actual position to the destination:
cameraGroup.position.x += (parallaxX - cameraGroup.position.x)
    cameraGroup.position.y += (parallaxY - cameraGroup.position.y)
Finally, we only want a 10th of that distance:
cameraGroup.position.x += (parallaxX - cameraGroup.position.x) * 0.1
    cameraGroup.position.y += (parallaxY - cameraGroup.position.y) * 0.1
The animation feels a lot smoother, but there is still a problem that some of you might have noticed.
If you test the experience on a high frequency screen, the tick function will be called more often and the camera will move faster toward the target. While this is not a big issue, it's not accurate and it's preferable to have the same result across devices as much as possible.
To fix that, we need to use the time spent between each frame.
Right after instantiating the Clock, create a previousTime variable:
const clock = new THREE.Clock()
let previousTime = 0
At the beginning of the tick function, right after setting the elapsedTime, calculate the deltaTime by subtracting the previousTime from the elapsedTime:
const tick = () =>
{
    const elapsedTime = clock.getElapsedTime()
    const deltaTime = elapsedTime - previousTime

    // ...
}
And then, update the previousTime to be used on the next frame:
const tick = () =>
{
    const elapsedTime = clock.getElapsedTime()
    const deltaTime = elapsedTime - previousTime
    previousTime = elapsedTime

    console.log(deltaTime)

    // ...
}
You now have the time spent between the current frame and the previous frame in seconds. For high frequency screens, the value will be smaller because less time was needed.
We can now use that deltaTime on the parallax, but, because the deltaTime is in seconds, the value will be very small (around 0.016 for most common screens running at 60fps). Consequently, the effect will be very slow.
To fix that, we can change 0.1 to something like 5:
cameraGroup.position.x += (parallaxX - cameraGroup.position.x) * 5 * deltaTime
    cameraGroup.position.y += (parallaxY - cameraGroup.position.y) * 5 * deltaTime
We now have a nice easing that will feel the same across different screen frequencies.
Finally, now that we have the animation set properly, we can lower the amplitude of the effect:
const parallaxX = cursor.x * 0.5
    const parallaxY = - cursor.y * 0.5
Particles
A good way to make the experience more immersive and to help the user feel the depth is to add particles.
We are going to create very simple square particles and spread them around the scene.
Because we need to position the particles ourselves, we are going to create a custom BufferGeometry like we did in the Particles and Galaxy Generator lessons.
Create a particlesCount variable and a positions variable using a Float32Array:
/**
 * Particles
 */
// Geometry
const particlesCount = 200
const positions = new Float32Array(particlesCount * 3)
Create a loop and add random coordinates to the positions array:
for(let i = 0; i < particlesCount; i++)
{
    positions[i * 3 + 0] = Math.random()
    positions[i * 3 + 1] = Math.random()
    positions[i * 3 + 2] = Math.random()
}
We will change the positions later, but for now, let's keep things simple and make sure that our geometry is working.
Instantiate the BufferGeometry and set the position attribute:
const particlesGeometry = new THREE.BufferGeometry()
particlesGeometry.setAttribute('position', new THREE.BufferAttribute(positions, 3))
Create the material using PointsMaterial:
// Material
const particlesMaterial = new THREE.PointsMaterial({
    color: parameters.materialColor,
    sizeAttenuation: true,
    size: 0.03
})
Create the particles using Points:
// Points
const particles = new THREE.Points(particlesGeometry, particlesMaterial)
scene.add(particles)

You should get a bunch of particles spread around in a cube.
We went through this part fast because we already learned how to make particles in an earlier lesson. If you struggled, it is normal. It is still a bit hard, and easy to make mistakes.
We can now position the particles on the three axes.
For the x (horizontal) and z (depth), we can use random values that can be as much positive as they are negative:
for(let i = 0; i < particlesCount; i++)
{
    positions[i * 3 + 0] = (Math.random() - 0.5) * 10
    positions[i * 3 + 1] = Math.random()
    positions[i * 3 + 2] = (Math.random() - 0.5) * 10
}
For the y (vertical) it's a bit more tricky. We need to make the particles start high enough and then spread far enough below so that we reach the end with the scroll.
To do that, we can use the objectsDistance variable and multiply by the number of objects which is the length of the sectionMeshes array:
for(let i = 0; i < particlesCount; i++)
{
    positions[i * 3 + 0] = (Math.random() - 0.5) * 10
    positions[i * 3 + 1] = objectsDistance * 0.5 - Math.random() * objectsDistance * sectionMeshes.length
    positions[i * 3 + 2] = (Math.random() - 0.5) * 10
}
Like for the objects material, we can update the color of the particles in the change event of the tweak:
gui
    .addColor(parameters, 'materialColor')
    .onChange(() =>
    {
        material.color.set(parameters.materialColor)
        particlesMaterial.color.set(parameters.materialColor)
    })
That's all for the particles, but you can obviously improve them as we did in the previous lessons with random sizes, random alpha. And, we can even animate them.
Triggered rotations
As a final feature and to make the exercise just a bit harder, we are going to make the objects do a little spin when we arrive at the corresponding section in addition to the permanent rotation.
Knowing when to trigger the animation
First, we need a way to know when we reach a section. There are plenty of ways of doing that and we could even use a library, but in our case, we can use the scrollY value and do some math to find the current section.
After creating the scrollY variable, create a currentSection variable and set it to 0:
let scrollY = window.scrollY
let currentSection = 0
In the 'scroll' event callback function, calculate the current section by dividing the scrollY by sizes.height:
window.addEventListener('scroll', () =>
{
    scrollY = window.scrollY

    const newSection = scrollY / sizes.height

    console.log(newSection)
})
This works because each section is exactly one height of the viewport.
To get the exact section instead of that float value, we can use Math.round():
window.addEventListener('scroll', () =>
{
    scrollY = window.scrollY

    const newSection = Math.round(scrollY / sizes.height)

    console.log(newSection)
})
We can now test if newSection is different from currentSection. If so, that means we changed the section and we can update the currentSection in order to do our animation:
window.addEventListener('scroll', () =>
{
    scrollY = window.scrollY
    const newSection = Math.round(scrollY / sizes.height)

    if(newSection != currentSection)
    {
        currentSection = newSection

        console.log('changed', currentSection)
    }
})
Animating the meshes
We can now animate the meshes and, to do that, we are going to use GSAP.
Add GSAP to the dependencies by running npm install gsap@3.12 in the terminal. We are using a very specific version of GSAP to make sure that the code is the same. If you feel like using the latest version, run npm install gsap but you might have to use a different syntax.
If you get vulnerability warnings, don't pay it any mind. It's not dangerous.
Once the dependency is added, import GSAP at the start of the code:
import gsap from 'gsap'Then, in the if statement we did earlier, we can do the animation with gsap.to():
window.addEventListener('scroll', () =>
{
    // ...

    if(newSection != currentSection)
    {
        // ...

        gsap.to(
            sectionMeshes[currentSection].rotation,
            {
                duration: 1.5,
                ease: 'power2.inOut',
                x: '+=6',
                y: '+=3'
            }
        )
    }
})
While this code is valid, it will unfortunately not work. The reason is that, on each frame, we are already updating the rotation.x and rotation.y of each mesh with the elapsedTime.
To fix that, in the tick function, instead of setting a very specific rotation based on the elapsedTime, we are going to add the deltaTime to the current rotation:
const tick = () =>
{
    // ...

    for(const mesh of sectionMeshes)
    {
        mesh.rotation.x += deltaTime * 0.1
        mesh.rotation.y += deltaTime * 0.12
    }

    // ...
}
To add more randomness to the animation, especially for the cone, we can also animate the z axis:
gsap.to(
            sectionMeshes[currentSection].rotation,
            {
                duration: 1.5,
                ease: 'power2.inOut',
                x: '+=6',
                y: '+=3',
                z: '+=1.5'
            }
        )
Go further
We kept things really simple, but you can go much further.
- Add more content to the HTML
- Animate other properties like the material
- Animate the HTML texts
- Improve the particles
- Add more tweaks to the Debug UI
- Test other colors
- Etc.